Fall Pumpkins Tutorial
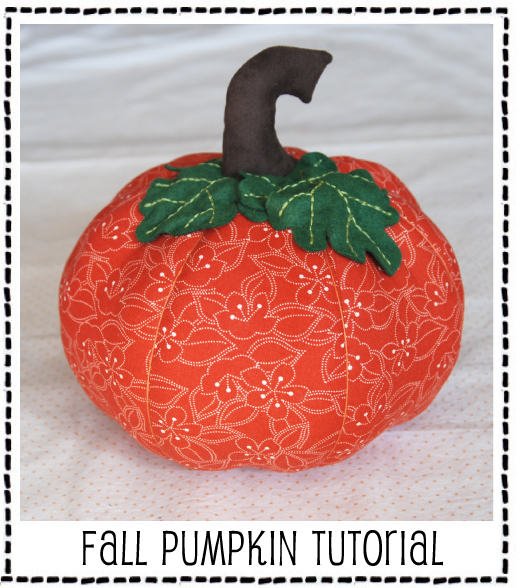
Ever since last week when I decided to make a polka dotted pumpkin that is all that has been on my mind. Well, not really, but close. I even dreamed about the best order to sew them together one night. And so I’m putting all those dreams to good use. And here is an easy tutorial to make your own fall pumpkin patch.

To start with you’ll need to download the pattern I created. It’s free, but please don’t reproduce it to share with others. (If they want one please send them to this post so they can download it themselves.) It’s two pages, one for the pumpkin body and one for the leaves and stems. UPDATE: I reloaded these two patterns on another server. To save to your computer click on each one, right click on the image and select “save image as…” and save it to your computer. If you are still having trouble viewing them please let me know in the comments. So click on those two links and download your patterns save your patterns to your computer and then print. They will print on regular 8.5×11″ paper.

I’ve made five pumpkins now in all different sizes, and I’ll give you my enlarging/reducing tips at the end of the tutorial. But let’s get started. Here is what you’ll need for a full size pumpkin.

You can use any non stretchy fabric to make your pumpkin. Cottons, Quilters fabrics, Corduroy, Velvet, Burlap, Home Dec. weight, and linen are all good options. For one of my smallest pumpkins I used part of a sleeve from a thrifted mens button-up shirt. You can also use any kind of fabric for the stem, this particular bit of brown is some soft faux suede. For the leaves use wool or wool felt (or fleece if you’re in a pinch) because it won’t fray.
- 3/8 yard main orange fabric
- Scrap of brown for the stem at least 4.5 x 8″
- Green wool felt for leaves (about 5 x 8″)
- Green and orange embroidery floss to coordinate with your body and leaves
- Matching thread for the pumpkin, dark thread for the stem
- Polypellets, White Rice, Dry Beans to weight your pumpkin base.
- Stuffing (Polyfill, Wool, Bamboo, or in my case, my old living room pillows.)
- Water Soluble Fabric Pen
- Scissors, needle, thimble, pins
If you are making a full size pumpkin you’ll need to cut your fabric very carefully. The pattern piece is 13.5 inches long, which is exactly how much 3/8 a yard is. So be careful, or buy a little extra. After making five pumpkins I think I’ve figured out the fastest way to cut out the seven pumpkin pieces. Trace your pattern onto the wrong side of your fabric, just inside the selvedge edge. Your tips should nearly touch both cut edges of fabric. After you’ve traced your pattern, fold the fabric up accordian style so you have seven layers together. (If you don’t have super sharp scissors try a stack of four and a stack of three). After you’ve got it all folded, press the edges to make them nice and straight. Then put a few pins in your stack and cut out. This is what it should look like when you’re done.
 The pins keep anything from shifting, and it’s much faster than cutting out 7 pieces individually, or in two’s. I tried both of those ways too. Then cut out the rest of your pieces.

You should have 7 body pieces, two circles, two stems and two (or however many you want) leaves. You should probably turn them into a Strongbad/luchador character… No? That’s just me? Fine. Moving on. We are going to be using a 1/4″ seam allowance throughout this project.* Using dark thread sew your stem pieces together, starting and stopping at the dots marked on the bottom of the pattern, leaving an opening at the bottom to turn. Backstitch at the beginning and end so your stem will hold up to the stuffing process. Make sure you use matching/pretty close-ish thread for this, otherwise you may see your stitches when your stem is stuffed. Sew your two circles right sides together. Sew all the way around, don’t leave a hole for turning.

Make a small slit with your scissors through the center of ONE of your circles. Be careful not to snip through the second layer. Turn the circle through the slit and fingerpress the edge, set aside. Now start sewing your pumpkin body pieces together. Match the dark dots marked on each point and backstitch at the beginning and end. It is going to look kind of like a beach ball. (And geez, next summer you could totally make one of those instead.)

Once you have all seven pieces sewn together, close up the last seam, making sure to leave an opening for turning, backstitching at both ends. Before you turn your pumpkin right side out, stitch over the ends a few times to reinforce them. Mine never matched up perfectly, and you’ll probably have a teeny tiny hole if you don’t close it up. The ends don’t need to be perfect by any stretch. We are going to cover both of them up eventually. Turn your pumpkin right side out.

Grab a small funnel, or make one out of paper and tape and let’s add some weight to the bottom of the pumpkin. With your stuffing hole at the top, add between 1-2 cups of polypellets, dry white rice or dry beans. I’ve made pumpkins with all three this week and I prefer the rice. It is a little heavier than the polypellets (and way cheaper) and when the pumpkin is finished the rice looks a lot smoother than the beans. How much rice (or whatever) you put in the base of your pumpkin is most going to determine it’s shape. If you only use a little bit of rice, your pumpkin will be more round looking.

[ I just noticed the gingham pumpkin was stemless. Thanks to photoshop now he’s not naked. ]
The large polka dotted pumpkin (full size pattern) has one bag (8 oz) of poly pellets in it. As a result it is a very round smooth ball shaped pumpkin. The striped pumpkin on the left side is a 75% size and has the same amount of poly pellets, but because it’s so much smaller, they take up a greater proportion of the pumpkins volume. The pumpkin I made while I wrote the tutorial (top right) has about two cups of rice in it. I’m not sure how all the volume and rice to polyfill ratio’s work, but I know that if you put more weight in the bottom then you’ll get a more bumpy (in the good way) kind of pumpkin. You can see on the two darker orangey pumpkins how they are not at all “round” and spherical…. but they have a good pumpkin shape to them. OK, enough about math, and shapes and volume. I’m sure you’ll figure it out.

Start stuffing your pumpkin full of stuff. I reused the fluff that was inside my old living room pillows. And keep stuffing stuff in there until you think it’s full. Then add a little more.

While you are stuffing, help give your pumpkin’s ribs (ribs? do vegetables have ribs?) some definition with a good squeeze. When you’ve got him near full to bursting, slipstitch the opening closed. Now we are going to give those ribs a little more oomph with some embroidery floss.

- Measure how much orange floss you’ll need by wrapping it around your pumpkin about 8 times. The floss is going to sit right in the seams that are on either side of each of the seven pieces. It ends up being a lot more string than you think you’ll need.
- Tie a double knot and starting at one end of your pumpkin, nestle the floss right in the seam and pull it tight along the rib to the other end. Take one stitch right in that ditch and tie a double knot. The biggest thing to remember is to push your needle UP at the beginning of each seam right in the ditch where the two pieces meet. That will help keep the floss tight in those seams and cover them up a little bit. Also, before you tie the double knot at each end, pull the thread pretty tight to give your pumpkin a little more of the squishy oommphy factor.
- Continue all the way around your pumpkin and end with another double knot.
- Pin your circle over the bottom (rice side) of your pumpkin and slipstitch in place to cover up all those double knots and any other little imperfections. (Resist the urge to sew this circle onto the end while your needle is full of thread from closing up the pumpkin’s stuffing hole. It makes adding the embroidery floss in the ribs a gillion times more difficult. Though not impossible… that’s how I did 3 of my 5.
Almost done, now it’s just a matter of getting your pumpkin dressed up in stems and leaves.

Turn your stem right side out and stuff with stuffing. You may have to trim some of the seam allowance off before you turn it to get a smooth corner. Make sure you turn out the teenycorners and get them tightly stuffed. Decorate your leaves with some embroidered veins if you like. I included two leaf shapes with the pattern. The pointy leaves were the first one’s I made, but I think the rounded leaves are easier to cut out. And they more closely resemble an actual pumpkin leaf.

Using a lot of pins, pin your leaves and stem directly to your pumpkin. Don’t pin your leaves on flat, give them a little bit of body and give and let them curl a bit. I used dark brown thread to attach my stems and leaves. Use a basic slip stitch to attach your stem first.

When you are sewing the leaves on take teeny little stitches on the top so they will kind of disappear in the pile of the felt. I only took one stitch at each pin, except where they needed to be tacked onto and underneath the stem. Don’t those leaves down all the way around every edge, it will look really weird. Kind of like my first one (below left).

Here are two more leaf versions. The left is my first pumpkin with the spiny leaves and very little embroidery for veins. The pumpkin on the right I didn’t use any embroidery at all, just tacked the leaves on. Both of these leaves are made from soft merino wool felt, made from a beautiful J.Crew sweater that I bought at the thrift store and felted. The leaves from the tutorial pumpkin are made from a wool/rayon blend felt I got at Joann’s. (I suggest not using acrylic felt, mostly because the colors are pretty bright and not very much like a natural leaf color.) You can add any kind of detail to the leaves with embroidery floss. Get creative and blanket stitch around the edges or add a little bug. If you get really adventurous and are cooking for a small group, embroider names on the leaves of baby pumpkins and use them as placecards at the table. Wouldn’t that make for a fancy Thanksgiving!

Ta-da! Your pumpkin is all finished. Make him some friends and let them hang out as a centerpiece from now until Thanksgiving. Or use them to play ball in the house. Or bowling. But don’t try and give them away, they are way too cute for that.

Alright, here’s some more math and measurements if you want to make pumpkins in all different sizes. Depending on how much weight you put in your pumpkin your height could change. If you use more rice, he’ll be a little shorter, and a little wider. Finished size is measured from the floor to the top of the stem.
- 125% Pumpkin (not finished, but cut out) requires 1/2 yard of orange, don’t try and cut all seven pieces at once. I’m guessing he’ll be about 13-14 inches high.
- 100% Pumpkin (orange polka dots in the back) requires 3/8 yard of orange. Finished pumpkin is about 10 inches.
- 85% Pumpkin (orange floral pictured throughout this tutorial) requires 1/3 yard orange, or one fat quarter. Finished pumpkin is about 8.5 inches.
- 75% Pumpkin (orange stripe) requires 1/3 yard orange, or one fat quarter. Finished pumpkin is about 7 inches.
- 50% Pumpkin (orange gingham and small orange polka dot) requires less than 1/4 yard. Finished size is about 4.5 inches.*
*When making a pumpkin at 50% of the pattern size I used a smaller seam allowance. It was only about 1/8″, because 1/4″ seemed like it was too big, particularly on the stem. I’m sure it would work just fine, but your pumpkin will end up a little bit smaller, and your stem will be skinnier.
If you run into any questions while making a pumpkin please ask them in the comments, and I’ll get back to you asap. If something is unclear please let me know. It’s well after one am as I’m finishing writing this post and I may have missed something. Also if you make a pumpkin please add it to the newly formed pinksuedeshoe flickr group. Actually, if you have made anything inspired by projects or tutorials posted here add it! It’s brand new and totally empty and lonely. It needs some freinds. I am hoping to do a pumpkin roundup post the week before Halloween from pictures posted to flickr. Of if you aren’t flickr savvy you can post them on your blog and email me the link, or email pictures directly to me. I hope to see a few more pumpkin friends in the next few weeks!
*** This pattern is for personal use only. You are welcome to use this pattern and tutorial to make pumpkin for yourself or to give as gifts, but please do not sell items made from this tutorial. If you’d like to borrow a picture of a finished pumpkin to post on your blog, please include a link back to this post. But please don’t post the pattern or parts of the tutorial on your blog. Thanks! ***
Trackbacks
- Pumpkins | It Just Dahned On Me
- No Carve Pumpkins «
- A Little Pumpkin Patch « pinksuedeshoe
- A Little Fall Roundup « pinksuedeshoe
- Fabric Pumpkins « candtcreations
- Luulla Handmade Blog » Blog Archive » Pumpkin Decorating Ideas
- Make Your Own Decorative Fabric Pumpkin Stuffed with Poly Pellets
- Stuffed Pumpkins | Stubbornly Crafty
- No Carve Pumpkins - Creative Party Themes and Ideas
- FREE Pumpkin Sewing Pattern For Beginners with Tutorial!!!
- Sweet Autumn Pumpkins | Sewing Shop Blog
- Thanksgiving Week This Sharing it Sunday -
- How To Attach Two Pumpkins Together | Windranger5
- Idee per decorare la casa a tema autunno - MangiaMondo
- Halloween Crafts – Chela's Colchas y Mas
- 32 Creative Ways to Decorate a Pumpkin – Tip Junkie
- 20 FREE Fall Projects To Quilt, Sew & Embroider - Jacquelynne Steves
- 13 Pretty Fabric Pumpkins to Make for Fall – Sewing
- 13 Pretty Fabric Pumpkins to Make for Fall - News Peter DIY Updates - Peter India News
- 13 Fairly Cloth Pumpkins to Make for Fall – Stitching - FALLINGFILM
- 8 Back to School Card Ideas with One Stamp Set - News Peter DIY Updates - Peter India News
- 13 Pretty Fabric Pumpkins to Make for Fall – Sewing - Hobby Blog
- Costume to Jumpsuit Conversion Stitching Sample – Stitching - Niraranra - Travel Savvy
- Dress to Jumpsuit Conversion Sewing Pattern - News Peter DIY Updates - Peter India News



Good Morning, E!
Love those pumpkins!
I just wanted you to know that I might have to ask for a sewing machine for Christmas! I’ve never sewn a stitch in my life. (Other than cross stitch or needlepoint.) But I really want to learn how. Yay! Thanks! You are an inspiration!
Have a great day!!!!
Pink,
Those pumpkins are awesome! I totally ♥ them all. My favorite is the orange floral that you used in your tutorial. Super cute! Nice job on the tutorial, as well.
xo -El
These are so cute! You are so talented 🙂 I keep seeing pumpkins pop up on people’s porches in my neighborhood and it seems about time to get down the Halloween decorations box for me.
this is so awesome!
Bravo and thanks for all this hard work! 🙂
I need to make some. 🙂
You’re so crafty! Are you going to pretend these are basketballs during March madness? 😉
xox
Squashy squash, rejoice! I can’t wait to make a field of pumpkins for my dining room table, to go with my pumpkin pillows on the couch. Thank you so much for sharing all of your hard work – that is incredibly generous. Your explanations are totally clear, I’m good to go! AND, I even have an orange/white striped thrifted man’s shirt. Yippee!
Or, could you make me a Strongbad “pumpkin”? Because that would be SuperGreat.
xox
I love Love LOVE your blog. It is my daily lunchtime treat! :o) Thank you a million times for posting this tutorial. I was hoping you would because I was coveting those pumpkins… You are so talented!
Aww, these are fabulous! Thank you so much for sharing this tutorial on how to make them. I hope I have time this weekend to try it out–I love it!
I can’t believe this! I was just thinking, “I wonder if anyone has a pattern/tutorial for stuffed pumpkins.” I’m not kidding. And here you are. Thank you! They’re wonderful and I can’t wait to make a couple… or a few.
excellent! I love them sooooo much! AND the fact that you referenced strongbad makes me love you even more!!! xoxo
I love this – could it convince me to stitch and make it – quiet possibly. Can I convince my boys to try it? ah there is a question
Fantastic project, clear images and I’m off to down load the pattern and thank you.
Love these! they are on ‘the list’ and I hope to get to them soon!!! Too Fun!
Many many thanks for the excellent free tut – much appreciated by those of us on limited incomes but lots of scraps !
This is THE BEST fabric pumpkin tute on the Internet! I know, because I looked for about an hour trying to find one I liked most. You get the gold star! I am a new follower now and can’t wait to see what other wonderful things you come up with!
Hi! This is such a wonderful tutorial! Thank you so much for sharing! I’ve just linked to your post from my site:
http://www.allfreeholidaycrafts.com/Halloween-Decorations/Cute-and-Cushy-Fabric-Pumpkins
I’d love to link to more of your projects in the future, so please let me know if it’s okay to do so as I have above.
Thanks!
Rachel @ AllFreeHolidayCrafts
Not seeing where I can download the pattern????? Where is it?
There is a link in the second paragraph to the pattern which you can download from google docs.
The tutorial seems very fun and straightforward! the only problem i have is that the template prints out nowhere near 13.5 inches…it’s barely half of that. Is there some trick to printing it out full size?
You can enlarge it on a copymachine but I don’t know why it isn’t printing full size. I might need to reload it. Last year I didn’t have any problems, but this year it hasn’t worked nearly so well. Maybe it got a bug in the file or something. I’ll see what I can do this weekend and let you know. So sorry!
Thank you – these are darling
Have you had Dutch licorice “dropjes” the are the best and in all shapes and forms, don’t know about black pumpkins though.
love IT!! have been wanting to do this all week – thanks for the “how to”
Thank you for the excellent tutorial! I think I’ve looked at every stuffed pumpkin tutorial there is (including the dubious toilet paper pumpkin). I’m very very happy to have found yours. Cheers!
Just remember that iif you use rice to weight your pumpkins make sure you store them where mice can’t get to them. I had snow men weighted with rice and when I went to retrieve them the mice had chewed holes in the fabric and ate out all the rice. And of course the holes were not in a place easily patched. I would use plastic beads that you can get little bags of in craft stores like Michaels.
I tried the plastic beads, but they weren’t heavy enough to work as well and didnt give me as good of a pumpkin shape. They were a lot more circular. I never thought about a mouse problem, but I am glad mine are sealed up in a big plastic rubbermaid tote!
I made them!!! I made 5 total… I am SO happy! I wish I could show you a picture of how mine turned out. Thank you for the AWESOME tutorial!
These are so cute!!! I was able to download the pumpkin pattern but when I clicked on the stem and leaves it redirects me to a google direct page. When I clicked on the pumpkin pattern it redirected me as well. I don’t know what I did:(
I’ll see if I can reupload the patterns… I don’t know what the problem is. Check back in about an hour and see if they are working, if not, I’ll just email them to you 🙂
e.
i would love the pattern but I was unable to download the pumpkin pattern.
I saw some of these in a catelog for 3/$29.95 and started to search for a pattern. Thank you so much. Love your pumpkins so so cute.
Just found this and cant download the first pattern piece, there is like a gray block on it, please help, as I would love to make these!! Thank you
Reblogged this on Jing, Beyond bondaries and commented:
I love this little DIY handcraft, if I have time in the coming weeks, I’d love to do that! 🙂
What talent you have, and what a beautiful daughter too. I am crafty, but my girls never
got interested. I love your tutorial, one of the best ever. I shop goodwill for any kind of fabric for my pumpkins. Just love them. Would like to see some other crafts of yours.
i can not print this pattern is there any way i can get this pattern for the pumpkins in the mail
I do instant free downloads because printing and shipping is such a hassle for me. So I don’t do printed patterns. Sorry!
e.
Love these! bought a set from a lady years ago and my best friend tries to steal them every Thanksgiving. LOL I am making her a set! Thanks so much for the pattern and tutorial!
“Fall Pumpkins Tutorial � pinksuedeshoe” was a quite wonderful blog post,
. I hope you keep creating and I’ll keep on browsing! Thanks a lot ,Mavis
I love the pumpkins. I am going to put one together tonight. Love your instructions. So precise. Thanks for taking the time and posting the pattern. Debbie
Reblogged this on Ramblings of a Quilting Squirrel and commented:
This is probably going to distract me from my new quilt for some time. Because I love pumpkins. And the idea of them being Thanksgiving placeholders.
Just finished mine ….
Just made one of these at 100% using a fat quarter. It came out super cute. I made the stem out of rolled up felt in two colors. Thank you so much for posting. The link has a picture of the pumpkin.
Thank goodness for your tutorial.
My 8yo grand-daughter wanted a pumpkin pincushion for her sewing box and now through you I have one. Sincere thanks for your time and effort in making this available.
It’s truly very complicated in this active life to listen news oon Television, thus I just use the web for that purpose, and obtain the newest news.
Good day I am so excited I found youir weblog, I really
found you by error, while I was searching on Askjeeve for something else, Anyways I am here now and
would just lile to saay thank you foor a fantastic post and a alll round exciting blog (I also love the theme/design),
I don’t have time to go through it all at the minute but I have saved it and also aadded in your RSS feeds,
so when I have time I wipl be ack to read much more,
Please do keep up the awesome job.
Thank you so much for sharing your wonderful fabric pumpkin tutorial and the pattern. I really appreciate it and will be sure to link where I got it. Hopefully in a couple weeks I can post a pic of the ones I make. Have a blessed day. Lynn
I love it!
These pumpkins look so great! They are the perfect decorations for this time of year. Thanks for making this tutorial!
I linked to this post from blog: http://www.sewingshop.net/blog/sweet-autumn-pumpkins/
How do I make the pattern smaller? What I printed from you is so big. Would love to make but about 7 inches tall maybe. Thanks for help cause I don’t know how to make pattern smaller.
preciosas me encantaron
Hi
I really enjoyed your tutorial for the Pumpkins – everything is so well explained and in such a lighthearted way. Thanks. I probably won’t download the pattern – at least at this time – though I sure am tempted. Too many unfinished projects begging for my attention.
You can be sure I’ll be looking for more of your great ideas if for no other reason than the fun of reading them
Blessings
Thanks so much for the pattern and tutorial. We had so much fun making these in a small group. They turned out so cute! The only adaptation I made was to make quilted leaves with a cotton print and quilt batt. Turned out better than I even hoped!
Thank you so much – I think this is the best I have seen so far. I love the quilt type and all others were different.
When I get my site set up I would love to give credit to you of the ones I make. Thank you again and I hope to see more of your work in the future.
I just made the 100% sized pumpkin and it is SO CUTE!! Thanks for sharing this tutorial. I wanted to share a photo but I can’t find your email address and I am not on Flickr. Anyway, nice work and I am excited to make more pumpkins to add to my fall decor! Side note, I didn’t have any rice or polybeads to weight my pumpkin, so I used some marbles and decorative stones I got at the dollar store a long time ago.They worked great! Also lessens the risk of critters wanting to chew them up. Had that happen with some beanbags (filled with corn kernels) we had for a cornhole game. What a bummer! So I recommend marbles as a substitute for rice. Pretty cheap and non edible!!
Also, had to log on with my daughter’s account, so if you would like to contact me use the email I provided. Thanks!
Hi, not sure if you will reply, but taking a shot at asking a question anyway! These pumpkins are adorable! I am wondering if i did 8 pieces instead of 7, would that alter the shape very much?? thinking i want to use different fabrics (4 groups of 2).
Thanks, jonelle
Yes. If you add another piece and do 8 instead of 7 it will change the shape of the pumpkin. But that doesn’t mean it will be bad! Try it and see what happens!
e.
>
Having trouble printing out the pumpkin pattern and the leaves/stem pattern. They are only little pictures in the center of an 8-1/2 x 11″ paper
Jennifer
Great pattern
I printed the pumpkin pattern. It printed three pages which appears to be one side. Am I doing something wrong? Thanks in advance for your help.
This is great! Thanks for the share and thanks for the guesstimates on size increase/decrease for yardage! I’m looking forward to trying it out!
I cannot print the template pages. Have tried several different ways. No success. Help!
I made the cutest 10” pumpkin from your pattern and I just wanted to say thank you. Wish I could share the picture with you!