Make Your Own Coloring Book

I made this little coloring book this afternoon for my nephew’s upcoming birthday. I’ve made a few of these now, and it is a very inexpensive gift with a lot of creative play built in. In my book that is a double whammy! Here is a how to.

Most of these things can be found around the house.
- About 100-ish sheets of plain white paper. Or you could print off coloring pages which are easy to find online and use those instead, or do a mixture of both. I used standard 8.5×11 paper, but you could use the larger legal (11×14) or ledger (11×19) size paper for a larger book.
- One piece of chipboard or thin cardboard the same size as your paper. I cut mine from the back of a cereal box.
- One piece of patterned scrapbook paper for the back cover. If you are making a large book, try a scrap of wrapping paper or wallpaper.
- Cropadile. I bought this tool years ago and it was a wonderful investment. It’s helped me make everything from coloring books to snowshoes. It will punch through about 20-25 pages at a time. (If you don’t have one, it’s OK. I have a few other ideas…)
- 2 Large clamps, or binder clips.
- 40 inches of ribbon, rope, string, twine, etc. If you are making a larger book, you’ll need extra.
- Glue, Ruler, Pencil and a needle with an eye large enough to string your ribbon/rope/string through.

To start off glue your decorative paper to one side of your cardboard. This is going to be your back cover.
 On one sheet of your white paper draw a line 1/4″ in from the edge of your paper. You could use either side, but I use the short side because the book seems to lay open better that way. Then mark a dot every 1/2″ from one end to the other, this is where you are going to punch your holes. I have 16 holes across my 8.5″ sheet.
 I took about 1/4 of my pages and stacked them up with a scrap piece of cardboard underneath. Then I clipped them together with my clamps to keep anything from slipping. Using my cropadile I punched out the holes I had marked with a 1/8″ punch. I like the small holes that this makes. If you don’t have access to a cropadile here are a few other options.
- Regular hole punch. This won’t go through as many sheets, so it will take longer, and your holes will be bigger, so space them a little farther apart. If you have larger holes, use a thicker string/ribbon/rope.
- Standard 3 hole punch. This will be a faster option than a small hand punch because it will punch more sheets at a time. You can adjust where the holes are by moving the posts inside the punch. You might have to move them three times to get enough holes. If you go this route, punch all your pages for the first spot before you move the posts to the second spot.
- You can take your paper and cover to your local copy store. A lot of largish copy centers (and copy centers inside OfficeSupply stores) have a paper drill. They can punch through a whole ream of paper with an electric drill, and they will be able to drill as many holes as you want. This might cost you a couple of dollars, so my suggestion is to do a whole ream or paper at once and make several books to make it worth your money. Also, call your copy center of choice first to find out prices, and to see if this is something they can do in house or if it is something they have to send out for.
- Super Old School way is to use an awl and a hammer and prick little holes in your paper. You’ll need to use very thin string/twine to fit through those tiny holes.
 After all your pages are punched, stack them up neatly with your back cover covered side out. Thread your needle with your ribbon/string/twine and find the center hole in your book. Since my book has 16 holes I started on hole 8. Starting at the top (white paper side) sew down through your holes to one edge of the book. Make sure to leave a ribbon tail about 12 inches long.
 When you get to the edge reverse directions and continue sewing back through your holes to the other side. That way you’ll have a solid line of ribbon and it will be stronger than a single stitched spine. Sew all the way to the opposite edge of your book.
 When you get to the edge, reverse directions again and sew to the middle where your ribbon tail is. Tie the two ribbon tails in a tight double knot. And then tie them in a decorative bow and trim the ends.

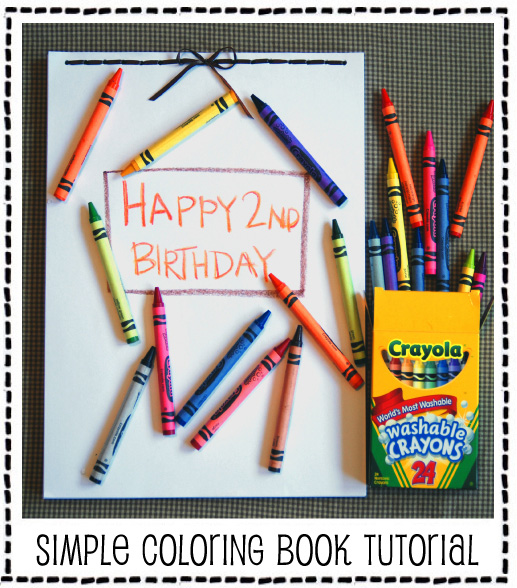
Now you’ve got a brand new book, full of empty pages ready to be filled with the latest masterpieces. Not much is more exciting to a two year old than blank white paper! Draw a little message on the cover and include a brand new box of crayons in your gift. (If it’s for a small person, get washable crayons. Their mothers will thank you.) Crayons will be going on sale soon for the back to school season so stock up. If you can get the crayons on sale you can create this gift for less than $2. And not much is more exciting to me than a gift full of hours of creative play and happiness that cost me the same as a large soda. Go forth and create! (To see any of these pictures bigger, please visit this tutorial on flickr.)
*** This tutorial is for personal use only. You are welcome to use this tutorial to make books for yourself or to give as gifts, but please do not sell items made from this tutorial. If you post pictures of something you made using this tutorial, please link back to this site I’d love to see your pictures. But please don’t post any part of this tutorial on your blog. Thank you. ***



you, my friend, write THE best tutorials. seriously. I love how detailed you are – you anticipate what readers are going to ask questions about really well and head them off at the pass to keep them going without missing a beat! (and you never make me feel dumb about all the inane questions I ask, either. there’s a whole lotta points for that, lemme tell you.)
What’s interesting to me is this: my son sees an occupational therapist and we were talking about him coloring and I had told this guy that my son (well, either of my kids, actually) does not stay focused for long and so it feels like I haul all of our art supplies out, get things set up, they start to color, I grab a drink and just when I’m about to sit down, they are done. *blink, blink* It’s so frustrating! He offered this tip, and I’m only telling you this because you said that 2 year olds LOVE blank paper… and, while I think that is sometimes true, I also think that it’s sometimes way too overwhelming to them to not have direction: he told me to draw a circle on a page, or several circles and ask my kids to make different versions of faces (i.e. one that is happy, one that is sad, one that is mad, etc.) so … maybe to kick it up a notch (or not, I’m just blabbering, I realize!) you could add a shape or some sort of instruction his mama or someone else could read to him on a dozen or so pages. That would add even more to the personality of the book (and the joy of a homemade gift!).
Have you tried to make a coloring wallet? I think that’s what they are called….
anyway! thanks for sharing this tutorial. again, I adore your tutorials. I can see how/why wordpress would pick it up for their page front or whatever it’s called. You’re good at instructing!
Oh my, the awesomeness! Thank you for this.
I will probably be too lazy to do it, but imagining that I would makes me feel like a crafty goddess.
Great tutorial! I am going to have to try this for myself someday.
Pink,
You are all about the details and I love it! Attention to details and careful work are what makes the difference between a great project and “home made.” {I know you know what that means because we discussed this on my blog 😉 } Hope your coloring book tutorial makes it to the big-time like the Watermelon tutorial :D.
xo -E
P.S. I have a Crop-o-dile too {super awesome tool!}, but it isn’t pink :(. I bought it when I was selling Stampin’ Up! and they only came in black.
love this so much! i will definitely be doing this in the near future!
Educate children and granulation colors to them is the responsibility of all of us.
Thanks for this post useful 🙂
Hi folks, just want to warn you – don’t pay $500 for platinum roulette system, you can find it
for free, just type in google – Platinum roulette system that works – you will find article about this system
I love how easy and fun this is! Making a coloring book from your own drawings feels so personal and creative.