Chocolate Peppermint Cake
I made this yesterday. And today it’s all gone. Now before you think I ate it all myself (totally within the realm of possibility) I was smart and spread it out amongst my friends and neighbors. Well except for that one piece that I kept for myself. I mean, I kept it to share with Scott and Creamie (not going to happen).

Looks delicious? I’m doing a guest post over at Bright Yellow World today. Go here for the recipe. Too bad there is no scratch and sniff app. Could I get some computer genius to get on that already? It smelled delicious. Of all the posts in my Handmade Christmas project, this one is the tastiest.
Making Gingerbread Houses
I’ve made a gingerbread house at Christmas for as long as I can remember. It’s one of those traditions that I never want to give up on. It just fels like Christmas. Creamie made hers last weekend at my mom’s house, and you’ve never seen a happier little girl. I mean, a whole table covered with candy, all at her decorating (and snacking) disposal? What kid wouldn’t be happy!

I was in charge of the frosting, but she was in charge of picking out candy and telling me where to put it. Oh, and she needed to do some tasting too. I’m pretty sure that’s the most important part.

She lost interest with one roof section left to do, so I helped her out a little bit. Just a little.

She was so proud of her little house, and she wanted nothing more than to eat it immediately. Particularly the door. I think that will be the first part to be consumed.

I’m finishing up the tutorial tonight, and I’ll post pics of my house and the recipe and template tomorrow. Happy Wednesday!
Last Minute Gift Soap
This is one of those projects that is more “hand assembled” than “handmade”, but I wanted to include it in my Handmade Christmas series anyway. Anyone can make this, no skill or craftiness required! It only takes 2 minutes to pull together, and works as a perfect hostess gift. I’ve been using one of these in my kitchen for the past four years and I love it. I am up for anything to make doing dishes a little prettier.

Start with an empty oil bottle. You can get these in the kitchen section of most large stores (Target, Walmart, Bed Bath & Beyond, Big Lots sometimes). You’ll also need some kitchen dish soap (I prefer yellow) and an artificial flower. Take the flower apart so you can use just a few layers of the petals.

Then it is as easy as stuffing the flowers into the jar and filling it up with soap. Two minutes tops.

You can tie a ribbon around the bottle and give this gift by itself, or throw in a few new tea towels and a cute scrubbrush. This also makes a good last minute shower or housewarming gift.

I love having this sit next to the sink instead of an ugly branded plastic bottle. Just make sure the recipient knows that this is dish soap and not a fancy cooking oil! I’ll post some sneak peaks of tomorrow’s project this afternoon. It’s one of my very favorite’s so far but it is taking a little longer to put together than I expected.
Christmas Poppers
One of my very favorite Christmas movies is The Snowman. It’s a sweet story about the magic that can happen when we believe in something outside ourselves. I’ve loved it since I was a little girl. (You can watch it on YouTube in 1, 2, 3 parts.) At one point in the movie there is a snowman Christmas party, and everyone is pulling Christmas poppers apart. Inspired by that scene, for Day Nine of A Handmade Christmas I made some poppers of my own.

It’s a pretty easy project. Materials needed are cardstock (or toilet paper rolls) colored tissue paper, some scraps of ribbon and hot glue. You can use some decorative scissors to trim the ends of the tissue paper before you wrap them up.

I just used a really thin line of hot glue to secure my cardstock into a tube. And then because the hot glue gun was just sitting there I used it to glue the tissue paper to the roll (you could probably use a gluestick or double sided tape just as easily). You could use these to wrap small presents instead of filling them up with treats. (Use a cotton ball at each end to help protect delicate items.) Of course, I prefer the treats. Unless it was a diamond tennis bracelet. I’d trade my standards M&M’s for diamonds anyday. Well, anyday I had access to my secret chocolate stash.

You can decorate each finished popper with scraps of ribbon, or paper, or fabric, or teensy little snowflakes. You could add one or two of these onto another gift as a topper, or use them to wrap money, or gift certificates.
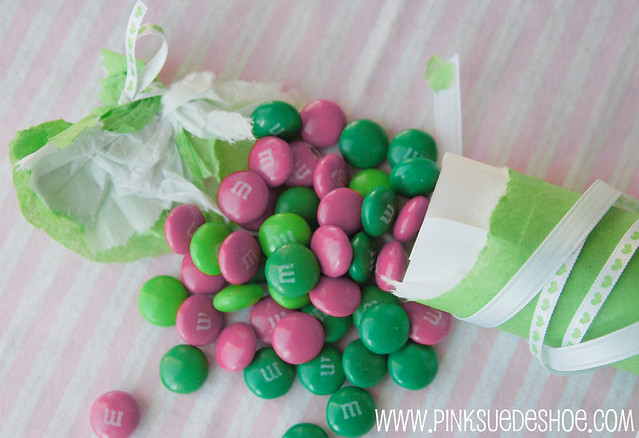
Tear open and enjoy your treat inside! Actually, they are so cute I might make these for every single holiday and non holiday aike. I love the way they look all together. For a few of them I used two pieces of colored tissue paper to give the ends a little more color.

Now I’m off to finish watching The Snowman with Creamie. And then we are going to tear a few of these apart so I she we can eat the M&M’s inside. And then we’ll probably watch it again. Because who doesn’t need more magic in their life.
The End of being a Baby
Yesterday we took Creamie’s crib apart and moved her into a twin bed.

Sometime between her nap yesterday and diner she became and expert climber. And since her crib is no longer a containing device, but an accident waiting to happen, it had to go.

I hadn’t really planned on starting on her new big girl quilt until January. But her room looks very plain without all her cute crib bedding. And I miss it. She did just fine without her crib the first night. And this morning she keeps piling all her toys onto her new mattress (it’s just on the floor for now). She is so proud to have her own bed. She’s so not a baby anymore. I’ll be back later today with another Handmade Christmas post. I’m a little behind, what with the very unexpected turn of events last night. I really hope that this isn’t the end of naptime for me. I’ll cry.
Needle Felted Mittens
Day Eight of A Handmade Christmas: Needle Felted Tree Topper that won’t fit on top of my tree. Lame. A few years ago, who knows how many, I saw a picture of a Christmas tree in a magazine/book/interwebs/blog/someone’s house/on the christmas tree at Jiffy Lube/[insert some other random place here]. Ok, so I have no idea where I saw this idea. I just remember that I saw it somewhere and I loved it. On this particular mystery tree they had used a red and white striped mitten as a tree topper. I fell in love with it immediately, and now between four and eight years later (I’m really good with details, clearly,) I am making my own version.

I of course don’t knit. Or crochet. In fact I don’t do much with yarn except make pompoms. So instead of knitting a super cute striped mitten for my tree I made a felt version. I used the sleeves from an old felted sweater, and I added the stripes by needle felting some super soft wool roving. Here’s the how to:

Supplies needed: Needle felting foam pad (or brush pad) needle felter tool, scissors, pins, wool roving and wool felt. Oh, and I would suggest not starting this project at midnight…

I started by laying my hand on a piece of paper and making a big mitten shaped template. Then I traced that onto the felt, and cut it out leaving about a half an inch all the way around. I cut my mitten using the ribbed cuffs of the sweater as the cuff on my mitten. Then I used a few pins to stick my felt to the felting foam so it wouldn’t slip around as I was working. Needle felting is pretty easy, it’s basically just punching those sharp barbed needles through the layers of wool to knit (but not like knitting) them together. Here is a more detailed post about needle felting at The Silver Penny if you want more info. She has videos and a free downloadable handout.

Make a few stripes on each mitten. I angled the stripes on the thumbs to make it look more like a knitted mitten. So that needle felter sharp needley tool thing. It’s sharp. So don’t poke your fingers. It hurts. Like a lot. Blood and tears aside, it was pretty cool to watch the whole thing come together. (NOTE: This is the first time I’ve used this particular needle felting tool and I don’t like it. It don’t feel like I have much control over where the needles are, and they seem really far apart for smalll detailed projects. I think I’ll return this one and try this one instead.) I used about a half a package of wool roving for this project, about $2 worth.

Next flip your mittens right sides together. The back of the needle felted wool looks all warm and cozy, right? Right. You could probably spend a lot more time and make the back sides look a lot fuller and use them as the front sides, but like I mentioned before… I started this project at midnight. Trace your template outline on the wrongside of one mitten. Line up both pieces at the cuffs and then sew right on the outline of the mitten to sew them together. This particular sweater when felted was SUPER thick. The two layers plus the roving stripes ended up being about a half an inch thick, so I had to use a walking foot to get the two sides sewn together. If you are using normal weight wool felt then you won’t have nearly so much trouble. After you’ve sewn the two sides together, clip off most of the seam allowance, right near your line of stitching, Turn your mitten right side out and use your fingers to smooth out the curves.

See, in a world not dominated by midnight projects (a world of which I can hardly conceive) this last picture would be of a cutie little needle felted mitten happily hanging out on top of my tree. But it doesn’t fit. It will fit. Eventually. You know, sometime tomorrow night after Scott has pulled out the reciprocating saw to nip off the top few inches of my tree, and trim a few of those top branches off closer to the trunk so this will slide down on top. But tonight, right now (at two in the morning) it doesn’t fit. So so lame. But it’s cute, and tomorrow when all is said and done I’ll have a very cute tree topper. See you tomorrow!
PS- Dear Santa, I lied about that whole going to bed before midnight…. please don’t bring me coal this year. I’m usually really good. Except about bedtime.
Stringing Popcorn
Day Seven of A Handmade Christmas: Popcorn Garland

Yesterday was super busy for me. It was our church Christmas party, and I spent a lot of the day getting ready for it. I sewed some costumes for the nativity, painted the inn’s, picked up food for 200 people, and helped clean up after everyone went home. When Scott and I finally got Creamie to bed we sat on the couch and watched a movie and then inexplicably stayed up talking until 4 this morning. Which was awesome, and stupid all at the same time.

We’ve had our Christmas tree up for nearly a week, and it is still completely undecorated, except for the lights. I’ve been waiting to make my popcorn garland so I can then load it up with the rest of my ornaments. So today I’ve been sitting on the couch listening to Sufjen Steven’s Christmas Album and stringing popcorn and pompoms into a garland.

Along with gingerbread boy cookies, popcorn garland’s were a big part of my childhood. For most of the year I don’t even like popcorn, hate it actually. It’s one of Scott’s favorite foods, but I think it’s about the grossest thing ever. However, I think it’s pretty perfect on the tree, so once a year I’ll pop my own large bowl. And I don’t eat a single bite.

I popped one cup of kernels in our air popper. And that gives me two huge large bowls of popcorn, enough for Creamie and Scott to snack and for me to make enough garland for the whole tree. That also means means this project only cost about ten cents. Then I use a big 6″ doll needle and the cheapest and/or ugliest thread I have. This is the fist time I’ve included pompom’s, and I think that might be a yearly tradition.

[ Free Felt Peppermint Pattern and Reindeer Christmas Ornament Tutorial ]
I’m off to finish up decorating the tree. And after two SUPER late nights in a row, I am making a promise in front of Santa and all of the internets that I will go to bed before ten, eleven, midnight. I swear.
Winner Winner Hot Chocolate for Dinner!
So I’m a day late posting the winner from my Snow Day Giveaway. Yesterday was epic. (Actually I should capitalize that.) Yesterday was EPIC! Too many projects and too much to do, and none of it involving being at my own house with my own little family. I hope I don’t have another of those days for a long long time.
 [ image from Martha Stewart, found via weheartit ]
Anyway the winner was number 9, TraceyJay. Your hot chocolate is on the way! Thanks for those of you who entered, it was nice to read a whole bunch of your favorite things about Winter. Unfortunately, all the beautiful snow that was here last Sunday is melted. Bummer. I’ll be back later today with another Handmade Christmas post. After I take a nap and recover a bit from yesterday. See you soon.
Cranberry Gingerdrop Cookies
When I was deciding what to post about during December I had things whittled down to two options. Twelve Days of projects for A Handmade Christmas (winner) or Twelve Days of Cookies. (But then I knew I’d be eating nothing but cookies for 12 days. Which would have been both good and bad.) I kind of consider myself a connoisseur of cookies. What I mean by that is I eat a lot of them. Like, an awful lot. For most of the year I eat chocolate chip, or peanut butter, or oatmeal butterscotch, or a really good snickerdoodle. But during the Holidays, I eat Cranberry Gingerdrops.

I love them because they are festive in all their cranberry redness. I love them because they are full of ginger. And I love them because no one else is going to bring them to the party. They are a soft puffy cookie, almost like a muffin top. And it is because of these cookies that I store two 5 pound bags of cranberries in my tiny freezer. They are that important.

Cranberry Gingerdrop Cookies
3/4 cup white sugar
1/3 cup brown sugar
1/3 cup soft butter
1/3 cup milk
1 egg
1/2 tea vanilla
2 cups white flour
1/2 tea baking powder
1/4 tea baking soda
1 tea ground ginger
1 cup fresh or frozen cranberries
Beat butter and sugars together. Add egg, milk and vanilla and mix well. Combine dry ingredients and add, mixing until well combined. Fold in cranberries. Bake at 375 degrees on a parchment lined cookie sheet for 10-12 minutes, or until the tops are light golden brown. Makes about 24 cookies.
Felt Peppermint Christmas Ornaments
I was waiting until we had the Christmas tree up to finish photographing this project, and it’s up, but the only thing that is hanging on it so far is three of these ornaments. Of course there are a bunch of gingerbread boys and a few reindeer just waiting for their turn to be hung up. Tonight’s project is to get the lights on and decorate our little tree. I can’t wait!

For the Fifth Day of my Handmade Christmas series I am sharing a free pattern for some plush peppermint ornaments. Here’s what you’ll need for each one.

Print off the template below, and trace onto red and white felt. You’ll also need a little polyfill stuffing, some ribbon and a bit of yarn (optional). Also, hot glue will make this whole thing MUCH easier. If you are using sheets of felt, you’ll need one of each color to make one ornament. If you are using 72″ wide felt, well you’ll be able to make six of them from a 6″x72″ strip.

Download my Felt Peppermint Ornament Template PDF and print on cardstock. [UPDATE: If you can’t download this template, email me at pinksuedeshoe at gmail dot com, or let me know in the comments and I’ll send it to you!] Or you can print it on regular paper and then trace onto cardstock or thin cardboard, like the back of a cereal box. Using heavy paper for the template will make tracing the pieces onto felt MUCH easier.

After you’ve cut your pieces out, use just a few dots of hot glue to attach the red swirly piece to your white circle. The hot glue will help hold the pieces together so you can sew them without using so many pins. Be careful not to get any glue where you will be stitching. It will gum up your needle, catch your thread and generally make for a very frustrating experience. Ask me how I know. In the photo above the top left peppermint is just glued together, the right side I stitched down with my sewing machine and the bottom one I used a little yarn to embroider around the edges. It’s my favorite. But I only used the yarn on one side because it took a while.

After you’ve stitched and/or glued each side of your peppermint together, line them up so the red’s don’t overlap too much. This will give you three layers of felt to sew through instead of four, which will be a lot easier. Insert a loop of ribbon for a hanger (or is it hangar?) and sew around the edge with a 3/8″ ish seam allowance. Make sure you leave a few inches open to turn. Then trim the edges close to the seam to reduce bulk and turn your peppermint right side out.

Push all the edges out to make it nice and round. Then stuff it with a handful of polyfill and slipstitch the opening closed.

Add a bow to the top and hang them on your Christmas tree. A cute completely unbreakable ornament that you can use again and again. Tonight is your last chance to enter my SnowDay giveaway!


