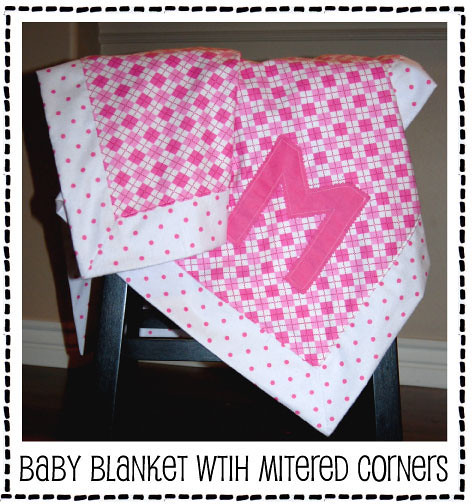
Monogrammed Baby Blanket with Mitered Corners
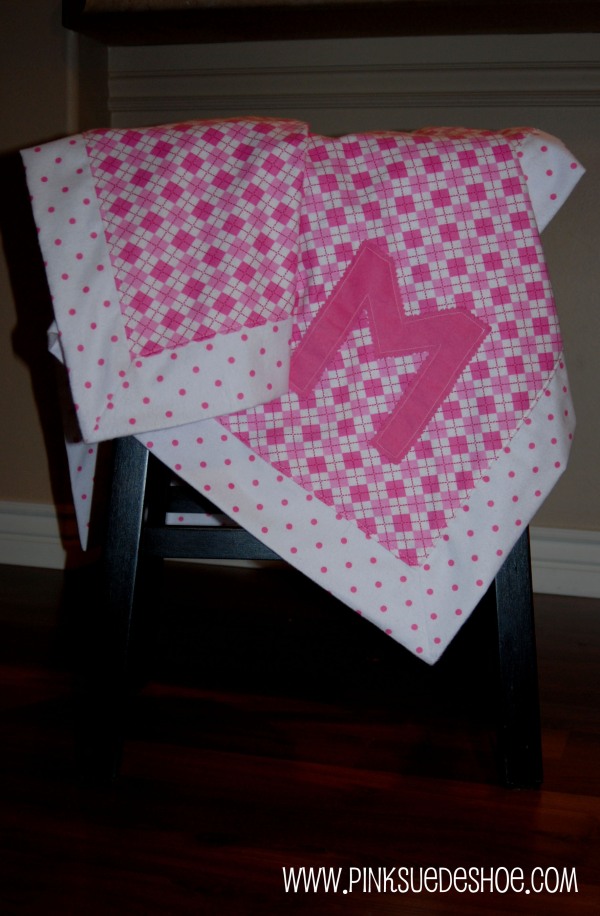
Last week I posted some pictures of a flannel baby blanket I made for my cousin and her new baby. I’ve made a few of these now, and decided to write my first tutorial on the subject. They are a great gift and go together pretty quickly. Happy Sewing!
Materials List-
- 1 1/4 yards (45 inches) backing fabric (the polka dot)
- 1 yard (36 inches) front fabric (argyle)
- optional 6″ square scrap for monogram
- thread
- monogram template (mine is just a plain piece of paper)
Tools Needed
- rotary cutter, ruler and self healing mat or scissors
- scissors
- pinking shears (optional)
- pins
- marking pencil
- iron and ironing board
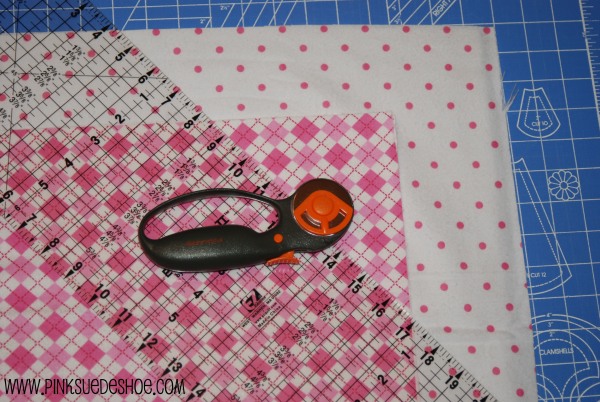
To get started cut your fabric into two squares. Make sure to trim off any printing on the selvedge edge that would peek through your seam allowances. The backing and binding is a 45″ square and the front panel is a 35″ square. (You can make it a little smaller with 40″ and 30″ square panels.) Measure carefully and cut straight on the grain. After you have cut your pieces, fold them in half diagonally to make sure you are all square at the corners. This will help insure your blanket doesn’t get any weird puckers at the end. Being square and straight is more important than the size. Just try to keep a 10 inch difference between the two panels. A rotary cutter and ruler make this really easy, but you could also use scissors.
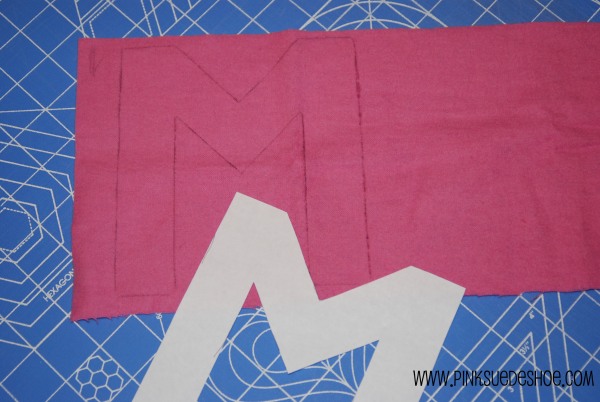
Adding the Monogram: On the wrong side of a scrap of fabric trace the outline of a monogram. (If your monogram has a specific direction it needs to go, like say an E, trace the mirror image, so when you flip it over to the right side it is going the right direction.) You could freehand your letter (or flower, or turtle, or whatever. There is a lot of options here) or you can use a die cut as a pattern, or print a letter in your favorite font from your computer. I just drew mine with a ruler and a pen.
Using pinking shears, cut your letter out. If you don’t have pinking shears, you could just cut it out with regular scissors. After you sew it to your fabric, you could clip the edges so it would fray like a rag quilt when it is washed.
Pin the monogram to the bottom right corner of your front panel. Mine is 3.5 inches from each side. Use lots of pins. You don’t want it to end up all wonky as you are sewing.
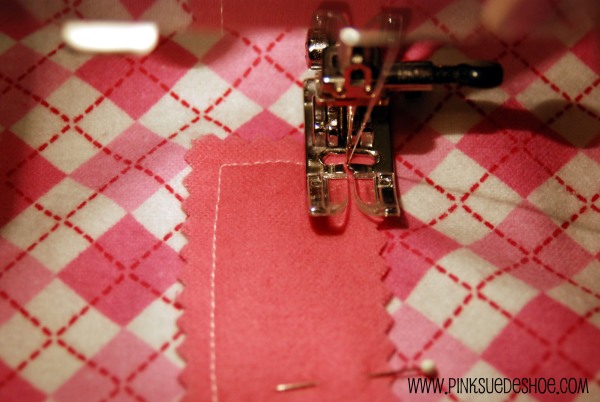
Starting in one corner, sew on your monogram without breaking your line of stitches. I used the inside of my presser foot as a guide from the edge. You could use matching or contrasting thread, depending on the look you are going for.
When you get to the corner and need to make a turn, stop and then manually move your needle to the down position before lifting the presser foot. Then you can make a clean pivot and keep things tidy on top.
If you have a corner like this one at the top of the M, you’ll need to mark the spot to turn, because you are going to sew past where your presser foot can guide you. I marked my sewing line in little black dots here.
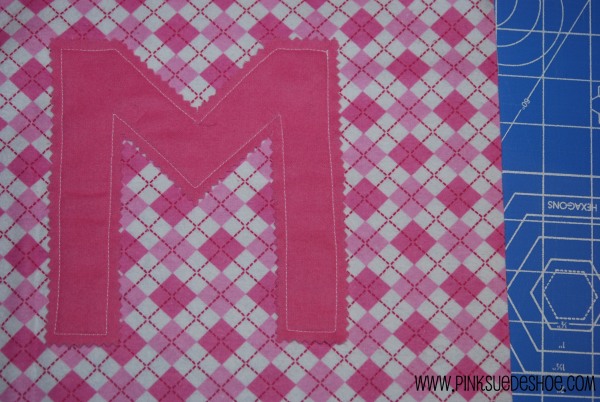 Ta-da! Finished monogram. Be sure you back stitch at the beginning and end. Now it’s time to sew your two panels together. Mark the center of each side of each panel with your fabric pencil. Starting in the center of each panel, pin right sides together, matching up center points. By starting in the middle of each panel and working your way out, you’ll reduce your risk of getting weird puckers, and of the blanket squishing up in one corner. (I am not usually a pinner, especially on long straight seams, but your miters will be neater if you do. Trust me.)
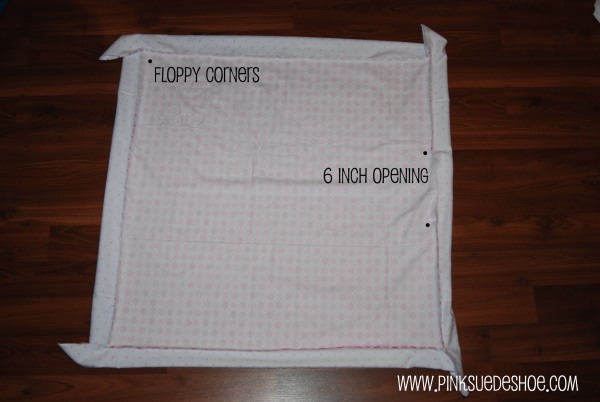
You should end up with some floppy corners like this. That’s good. That is going to be the mitered corners and the binding.
Now start sewing. Start at the center of each side and sew from the middle out to 1/4″ away from the corner on the front panel, and end with a backstitch. Repeat on 3 sides. On your last side, leave a 6 inch opening in the center to turn your blanket through.
Lay the blanket out flat. The back panel is going to fold over the front piece, which is the self binding. Now, it’s time to make those mitered corner’s.
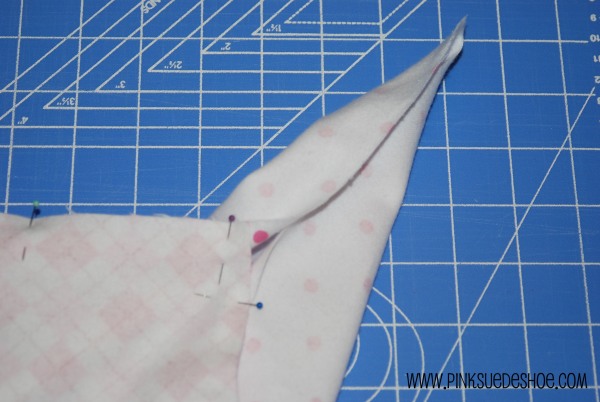
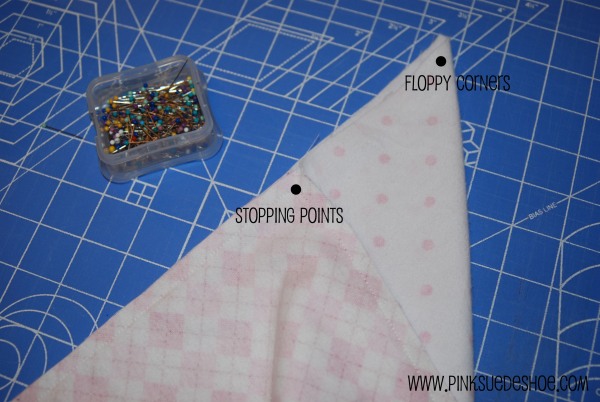 Here are where your stop points should be, 1/4 inch away from the edge. Lay your first corner so that it looks kind of like this, and then fold your side seams together, making everything as smooth as possible and matching the stop points.
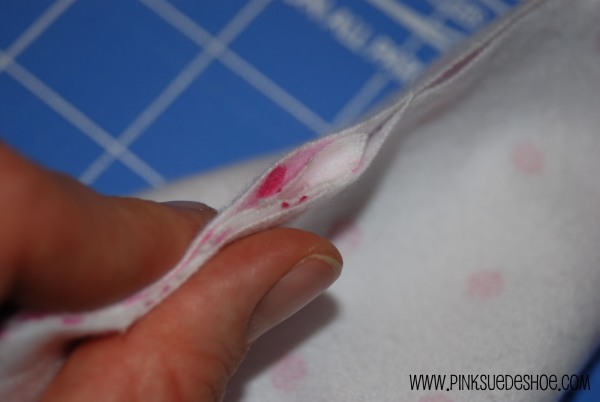
Once you fold the seams together, it should like kind of like this. The smoother you make everything now, the less bunchy things will be at the end. Which means less unpicking.
Now on to those corners.
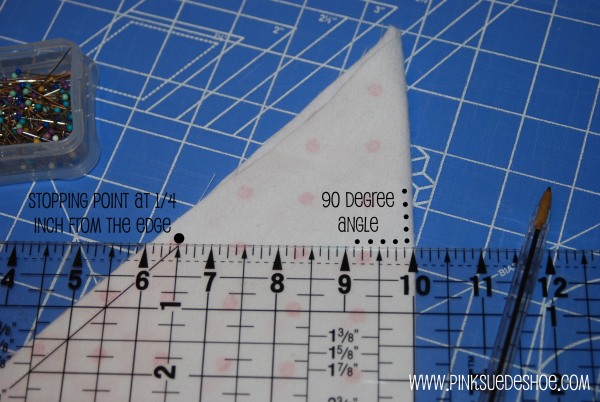
Mark a line from your stop points to the folded right edge, making a 90 degree angle. This is where we are going to stitch. After you mark your line, pin the stopping point side to keep everything together while you stitch.
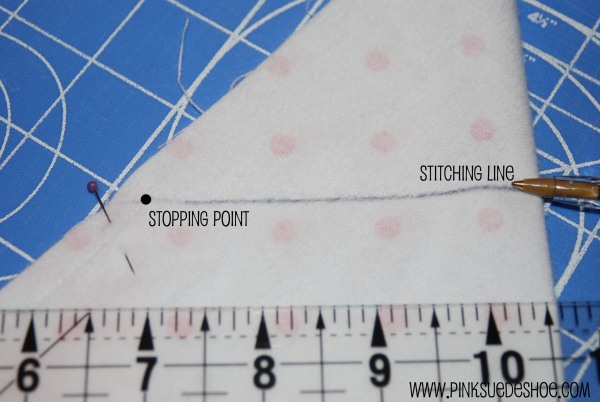 Start at the stop point and sew to the folded edge of the binding. That is the miter, so sew carefully. If you want to check it, sew with a long basting stitch first (I totally did this the first few times I made this blanket), then turn it inside out and look at your handiwork. It’s much easier to do any unpicking now. Finish all four corners in this same way.
Trim off those floppy corners to make nice tidy miters. Trim all of your threads. Then lay your blanket out flat again.
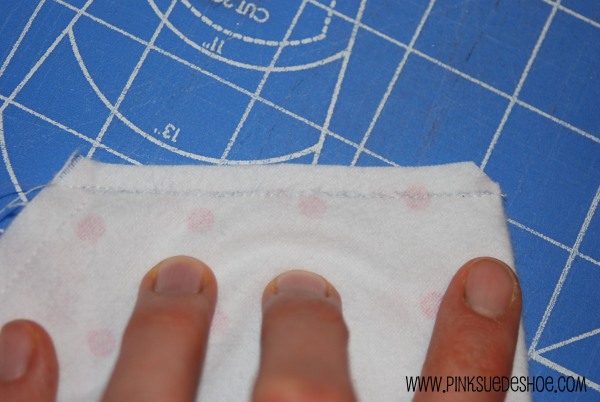
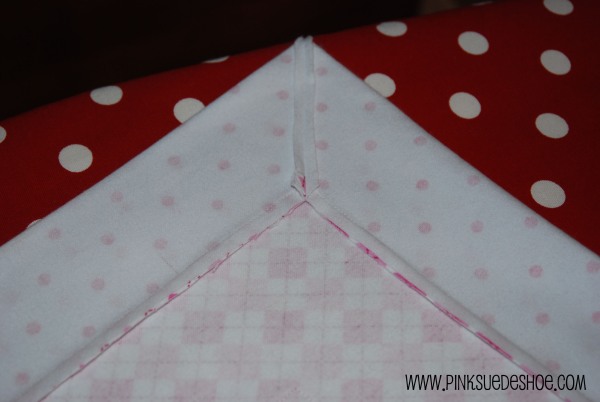 Press the corner seams open, and press the front panel seams to the center. You are going to topstitch over these in a minute so they don’t get bunchy and wonky in the wash.
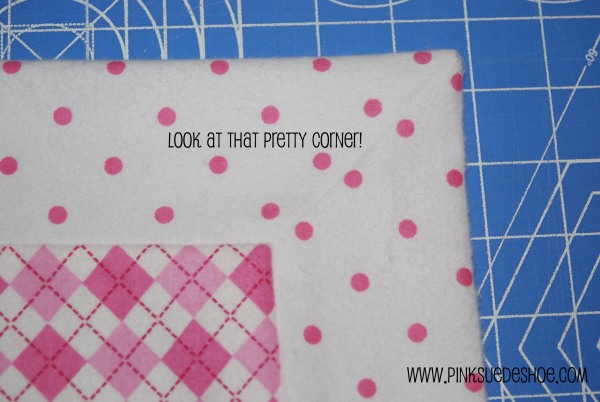 Turn your blanket right sides out through your 6 inch opening, and admire your pretty corners. Then press the edge of the binding to make it nice and neat.
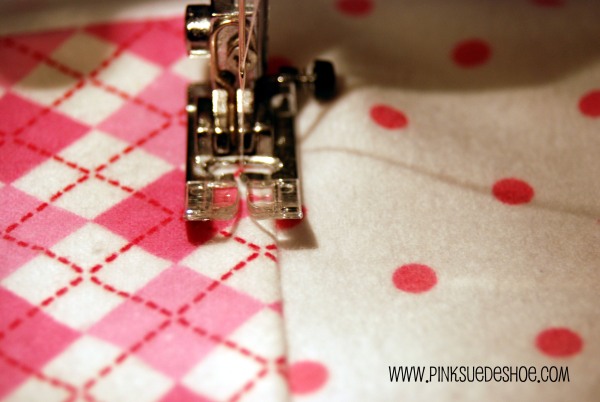 Check your bobbin thread. Top stitch all the way around the front panel. (I set my machine to a longer stitch to do this.) If you have a pretty decorative stitch you could also use that. Use the inside of your presser foot as a guide to make sure you catch the seam allowances on the inside.
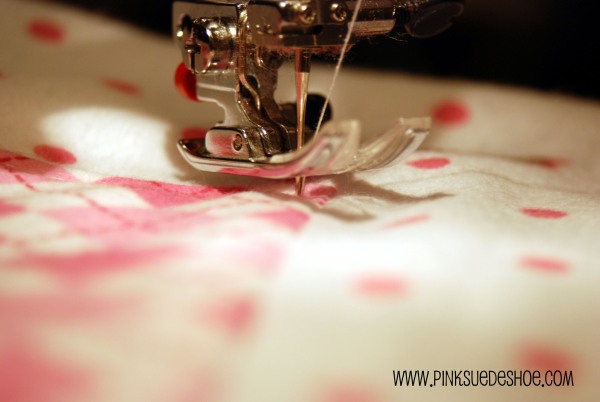 Pivot with your needle in the down position on all four corners.
 When you get to your 6 inch opening, fold under the seam allowance and pin it closed. Then topstitch over it to close it up, backstitch at the beginning and the end.
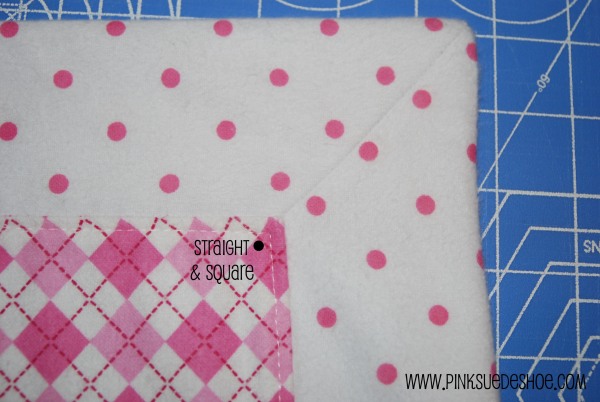 You are done! Now just look at those pretty mitered corners, all square and straight!
And now you have a beautiful blanket to keep or to give away. Mine ended up being 38 inches square (starting with 43 inch and 33 inch panels.
*** You are welcome to use this tutorial to make blankets for yourself or to give as gifts, but please do not sell blankets made from this tutorial. If you post pictures of a blanket you made using this tutorial, please link back to this site. I’d love to see your pictures. But please don’t post any part of this tutorial on your blog. Thank you. ***










this is really a sweet little blanket. i love the personal touch with the monogram
What a sweet little blanket. SO cute. Thanks for sharing!
My sister-in-law has a baby boy coming this April. Thanks for the quick and easy directions. I will be using this idea!
What a sweet little blanket…it is very cute!
What a great, clearly written and well-photographed tutorial.
Thank you !
I have some green turtle flannel that would make a wonderful blankie if I haven’t waited too long……..little Seth is already 8 moths old ! By the time I find the other fabric I’d like to use, he’ll be starting kindergarten !
Great blanket. Thanks for sharing the tutorial!!
Great tutorial, thanks for sharing.
Great job on the tutorial! These are just so sweet…
Awwwww, fercute!
xox
There are several tutorials on the web for doing this type of blanket, but yours is the best! Your clearly written instructions and excellent photos make doing this project hassle free. Thanks for posting it.
I loved it! I’m going to make one. Thanks for the great tutorial.
Andrea Iorio (Brazil)
Thanks for posting this. I’ve never known how to make a blanket like this and have always wanted to. I will have to try it out soon. Also, I love te fabric. You make me a blanket for Ellie out of the same stuff and we have LOVED it. Thank you, Thank you!
I have wanted to understand how to do this technique forever! I am so glad you posted this because I seriously feel better knowing how darn easy this is!!!
THANK YOU!!!!
So, between your tutorial, another online tutorial, and a long phone call with my mom I have made a tiny mitred corner baby blanket. Or baby handkerchief. Anyway, thanks for the great tutorial!
Love the blanket, the first one I tried (not so good) the second one was Perfect!! thanks so much.
I have made a few of these but the corners never lay flat. Your awesome description and picture of the 90 degree angle helped me to get it right. Thanks!
I used another online tutorial and it didn’t quite work , since I kinda did the corners backwards ; I cut it apart and used your tutorial and ALMOST did it backwards again , however caught myself in time ! thanks ! it worked ; my blanket is really small , but I’ll
give it to my granddaughter for one of her dolls !
Thanks for this really great tutorial. I was stressed about getting the fabric squared properly, and had to pick and resew the last corner, but it turned out 99% perfect and that is all thanks to your great directions and pictures! I just posted a picture of it on my blog. Feel free to check it out. Thanks again for your great tutorial! http://three65create.blogspot.com/2010/10/self-binding-baby-blanket-99365.html
I have made many of these blankets thinking I could do the next one better.
The problem I am having is getting the materials perfectly square.
I have been doing everything that you explained in your tutorial but I always seem to get one corner that is smaller than the others and the backing is not the same width all the way around. The corner that is smaller doesn’t make a perfect triangle and I am so FRUSTRATED.
I have made some that have less than 2 inches for a border and still the same problem.
In your photo of finishing your stitching from the stop point to the fold of the 90degree
triangle it looks like your stitching started at the edge of the fabric rather than from
the stop point. Maybe this is my problem?
Any tips would be much appreciated. Thanks so much
thanks so much for this tutorial! i whipped up my first baby blanket last night! 🙂 went super fast, i think i was done in less than 2 hours (including cutting the fabric!) it’s not perfect, but i can see the things i will do better with next time. it was so fun, thanks! 🙂
a link to the blankie i made with this tut! 🙂 http://andsewitis.blogspot.com/2010/12/self-binding-baby-blanket.html
I loved this self binding blanket tutorial. The mitered corners are unbelievable. I made a small lovey blanket out of plush polka dot fabric. It is perfect. Thank you and check it out my blog post. http://hisandhershomesteading.wordpress.com/2010/12/29/minky-baby-bla…itered-corners/
I have looked at quite a few tutorials on this, but your pictures finally helped me make it right. The first 2 times I tried, the corners ended up looking like fitted sheets. I almost cried (really) when I finally got it right! Thanks so much! You are my new favorite person! 🙂
I’m excited to make one of these. SO CUTE! Your instructions look pretty easy to follow, too!
Thanks so much for the great tutorial and photos. I love this little blanket and have just made my second one. First was for my one week old first grandchild and now one for a gift for a friend’s first grandchild. So pretty and so professional looking and personalized with the monogram to boot!
Can this method be used on a rectangular blanket?
I am sure that it can. I haven’t tried it myself, but I can’t think of any reason why it wouldn’t work out. Good luck, and let me know how it goes!
e.
Hi there! I made this blanket the other night after scouring the internet for tutorials that I could understand. Took a bit of thinking, but it went great. Thanks for posting this, yours definitely helped the most!! I actually did make a rectangle. My “back” fabric was 7″ bigger on each side. So, once it was all pinned, it was just going to be a bigger binding! Turned out cute, for a first-time project!
Annie
Hi
I used your great tutorial.
you’re welcome to come and see the finish product…
🙂
it’s in Hebrew but the pictures are universal.
http://www.tapuz.co.il/blog/net/viewentry.aspx?EntryId=2210310&r=1
I have been staring at my fabric for over an hour trying to figure what I did wrong with my corners. I then came across your tutorial. Thank you so much for the wonderful pictures and discriptions. I finally figured it out. I should have this blanket done in no time now!
Your tutorial is excellent!! Thank you for Clear instructions. I have trouble following written instructions and this looks doable for me. Your blanket is adorable.
My mom has a couple of patterns for this blanket that we have used and are INCREDIBLY confusing. I’m a very novice sewer and never would have been able to make this blanket had I not stumbled across your tutorial. Your instruction coupled with the pictures made everything very clear. I so appreciate it. And the monogram is adorable. Thanks so much fr sharing!
do you have a video of this? i have all my sides sewn and have started on corners, but this is unclear and i feel as though there are some steps missing. it is as if i’m expected to know/assume something that i obviously do not know.
I don’t have a video, this tutorial is more than 18 months old. I am sorry if there is something that is unclear, I know there are several similar tutorials out there to make this same kind of blanket with mitered corners. Maybe if you do a quick search and read a few others they will have something in theirs that will help. Or even check YouTube, someone might have made a video for this very thing already. 🙂 Good luck!
I am in the midst of trying to make one of these beautiful blankets. I am having a lot of problems and I think that an important clarification is that the seams are 1/4 inch seams, not the usual 5/8 inch seams. I think that after I get the seams ripped and resewn, it should be much better!
Thanks so much for sharing this!!
As long as the seam allowance is the same through out your project it doesn’t much matter what it is. These are 3/8″. I just lined them up with my presser foot. But as long as they are consistent it will turn out alright. Good luck, I hope after a bit of unpicking it turns out! (I have unpicked my whole blanket more than once. It happens sometimes.)
I’ve made many of these blankets, but have usually used the cute plisse type fabrics and have not prewashed the fabric. That is the only thing that worries me about flannel. Have you prewashed your flannel to preshrink it? When I have made other blankets using two layers of flannel they go kind of wonky after they are washed.. Also, just want you to know that your tutorial is the clearest I have read and easy to understand. I make mine this very same way!! Thanks!!
Thank you so much! I do prewash every fabric I sew with, it’s too scary to leave shrinking to the dryer monster! I’ve had one too many (it only took once) projects unfortunately shrunk by washing. Thanks Marilyn!
Beginner sewer here. I’ve bought fabric to make 2 of these adorable blankets. I bought 1 1/4 yard flannel like listed. The problem is that the width of all my fabric is about 42 inches. Every tute ive seen on this type of blanket says the backing fabric needs to be 45-46 inches. So did I just not pay attention to the fabric width when I bought it? I thought that was something fairly standard.
Nearly all flannel that you can buy these days is somewhere between 42 and 45 inches wide. It should be more standard than it is, but it’s not. It doesn’t so much matter what your width is. Just make sure your squares are indeed squares. As long as the backing and binding square is about 10 inches bigger than the front square you are good to go. So trim off any of the printing on the selvedge edge (one side of your fabric might have the designers name, the manufacturer or the name of the print on the flannel) and then just make sure you’ve got a square. If you end up with 41″ for the backing/binding square, then cut the center square at 31″ square. This might change the finished size of your blanket a bit, but only by a tiny bit, and it shouldn’t really matter much. It wasn’t that you just weren’t paying attention, “standard” fabric width is just so variable sometimes! (Which is kind of annoying, I know.) Good luck!
e.
Thank you so much for the quick reply. Really appreciate your feedback!
Great tutorial, thanks! Can I make this a single bedspread by changkng the size or is the ratio you used for the two fabrics the key for succes?
No, you can totally change up the sizes! The difference in the sizes, not the ratio, is going to determine how big the folded over binding will be on the front. The difference in mine is 10″, which makes 5″ on each side, which gives me about a 2 1/4″ border from the front (taking into account seam allowance). You can make this a big giant rectangle, no problem. I’d probably give a twin size bedspread a bigger border though. I’d make the difference between the front and the back more like 20-22 inches so you’ll have a wide 5″ish border along the edge. Unless you are using super wide fabric you’ll probably have to sew two pieces together to get a panel big enough for the front and the back, so keep that in mind.
The other tricky thing will be that sewing those long sides you’ll have to be careful to pin and sew carefully so the corners match up to make the miters. Don’t forget to pin from the middle, and then sew from the middle. You want any extra drag to be evenly distributed to each corner. If you start at one corner and sew to the other the extra fabric will all be in the corner you end on. So pin it to death, and start from the middle. 🙂
e.
The best way to avoid the slippage in the layers is to sew with a walking foot. If your machine didn’t come one (usually a standard foot for any quilting machine) you can probably buy one. You’ll be amazed at how much better your results are and you can sew edge to edge rather than starting in the middle. Interesting way of mitering. I will try on my next quilt.
Thank you so much for your tutorial. I had started making some blankets from another one a while back. Yours is so much more clear. Love the pics. Since I left some of my blankets unfinished and couldn’t remember the steps, I was searching for the instructions. I’m so glad I found yours.
Than you very much for your help.
Thank you sooo much for the detailed pictures!!! The lady at my local fabric store gave me directions for how to make this but I was completely lost on where to put my seam allowances for the top stitching. I wasn’t about to just wing it on my way too expensive minky (and also the cutest I’ve ever seen). I think I’ll still make a flannel one tomorrow to make sure I understand the concept before I begin the real project, I just need to find another baby to gift it to.
What seam allowance do you use when sewing the miter corner baby blanket.
I also saw this tutorial on another craft video. I have them all cut ( stacks) out and when I have some down time from other projects I make one or two. I usually donate them. They are fun and very cool. I am thinking of making one similar only in a rectangle instead. I have the fleece for the back and then flannel for the inside piece. I do not see how it couldn’t work as long as the edge pieces are the same distance from each other all the way around. Quick and easy blankie….Pat in AZ
I’m making one of these right now. The instructions are excellent. Just one complaint…my monogram is S for Sophia. You should provide some instructions for sewing curves!!! I had to practice on scrap for an hour. Fleece backing with a cotton inside. It’s coming along great!
this was not an easy tutorial to follow. I could not tell if which edges I was supposed to sew together. Wasted fabric and time trying to figure this one out….and I have made a TON of baby blankets. Thanks for sharing but I feel the pictures did not do justice.
I am sorry that you had trouble with this blanket. I know that can be frustrating. I hope you can find another tutorial that you feel helps explain it better. I know there is a similar tutorial that was just posted a few weeks ago at diaryofaquilter .com. Good luck!
>
Thanks for this great tutorial ! I thought it was clear and concise and have referred many friends to your site. I am fairly new to sewing and have made fewer than a dozen baby blankets, so I need clear instructions, yours were the best I have found! Thanks! Keeping up a blog is no small task, please keep up the great work!
I made a blanket like this a couple years ago, but now my lil girl is getting bigger and I’m try to figure out: Can you make this style blanket rectangular? (so that it’s taller)
Yes! You can certainly make this kind of blanket a longer rectangle. Just keep the dimensions for the front and the back 10″ difference. So if the back/binding piece is 44″ x60″ then make the inside piece 34″x50″. If you want to make it any wider than that you’ll need to piece the back, or you can use minky fabric, which generally comes at 60″ wide. That would give you a wider finished blanket as well. Good luck!
e.
On Thu, Nov 14, 2013 at 2:01 PM, pinksuedeshoe
I want to make pot holders using this technique. I’m having trouble figuring out the dimensions of the two squares to end up with a potholder roughly 7-8″ square. I tried using 20% of both measurements (7″ and 9″ squares), but the corners did not work. Thanks for your help!
Thanks for the good writeup. It actually was a amusement account it.
Look complicated to far brought agreeable from you!
However, how can we keep in touch?
Research affiliates so you are comfortable with them before accepting them.
For companies that have existing budgets, it’s rather easy to
determine the amount to spend relative to the
marketing approach. IMC strategies define your target audience, establishes
objectives and budgets, analyzes any social, competitive, cultural or technological issues, and conducts research to evaluate the effectiveness of your promotional
strategies.
Hi i am kavin, its my first occasion to commenting anywhere, when i read this post i thought i could also make comment due to this
good article.
Wonderful article! We are linking to this great content on our website.
Keep up the great writing.
First off I want to say excellent blog! I had a quick question in which I’d like to ask if you do not mind.
I was interested to know how you center yourself and clear your head prior
to writing. I’ve had a hard time clearing my thoughts in getting my ideas out.
I truly do enjoy writing but it just seems like
the first 10 to 15 minutes are usually lost just trying to figure out how to begin. Any suggestions or hints?
Kudos!
You’re so awesome! I don’t think I’ve truly read something
like this before. So good to discover somebody with some genuine thoughts
on this issue. Seriously.. thanks for starting this up.
This web site is something that is needed on the
internet, someone with a little originality!
What fabric did you use exact ? Was it like cotton or something ?
Simply want to say your article is as astounding. The clearness in your publish
is simply spectacular and that i could suppose you’re a professional in this subject.
Fine along with your permission allow me to grasp your
feed to stay updated with coming near near post.
Thank you one million and please carry on the rewarding work.
What’s Happening i am new to this, I stumbled upon this I have discovered It absolutely useful and it has helped me out loads.
I am hoping to contribute & help other customers like
its helped me. Great job.
Great goods from you, man. I’ve understand your stuff previous to and
you’re just extremely magnificent. I actually like what you’ve acquired here,
certainly like what you’re saying and the way in which
you say it. You make it enjoyable and you still care for to keep it wise.
I cant wait to read far more from you. This is really a terrific web site.
If you are going for most excellent contents like me, simply
pay a quick visit this site every day for the
reason that it offers feature contents, thanks
Hi, the whole thing is going fine here and
ofcourse every onne is sharing information,that’s truly good, keep up
writing.
Hi, after reading this awesome paragraph i am too happy to share my familiarity here with mates.
Soooooo glad I stumbled upon your tut! I was thinking of doing some quilted throws in this style, but hadn’t figured out the mitered corner. Thanks for sharing!