I’m feeling a little blue
But don’t worry, it’s not anything a few pretty things can’t figure out.

[ image by mia takahara ]
 [ image by smaginnis11565 ]
 [ image found via weheartit ]

 [ image by creature_comforts ]

 [ image found via weheartit ]
 [ image by Lola’sRoom on etsy, found via weheartit ]
Here’s to Tuesday!
More Art Journals
I can’t believe that my six week art journal class is over. It’s gone by so fast! I have dozens of pages to catch up on, but here are a few of my latest.


 [ click on any image to see it bigger in flickr ]
I am probably going to be playing catchup on these pages for a good long time, which is totally awesome for me. I have loved taking this class and I can’t wait to take another from the brilliant minds behind Red Velvet Art. I will probably post a few more pages over the next few months here on my blog, but if you want to check out everything I’ve done they will (mostly) all be posted on flickr. Six weeks ago I’d never really used flickr for anything. And wow. I can’t even tell you what I was missing out on! It has been so much fun to spend my naptimes looking at pretty stuff over there. Flickr makes me happy! (And they didn’t pay me to say that, but if they had offered I totally would have taken them up on it.) Happy Monday!
Summer Days
It’s only officially been summertime for less than a week, and Creamie is loving almost every minute of it. I however was thrilled with my spring temperature of 65 degrees. This 90 degree stuff is ridiculous. (I’m a winter girl, and that’s hot.) Here’s how Creamie has kicked off our summer. I’ve spent most if it with a camera in my hand, clearly.
 [ An afternoon picnic with her great grandpa ]
 [ Playing outside a lot. This is my favorite face ]
 [ Hanging out with her aunts ]
 [ And with Abuelita. ]
 [ She loves her sunhat. She takes it with her everywhere. ]
 [ A quick family pic under the Cherry tree. Pic by BIL Eric ]
 [ Playing in the pool with Dad in my new swimming suit ]
 [ Watching a Flying Iris. ]
 [ Sunscreen hair… necessary because she doesn’t have enough hair yet to protect her head. ]
Besides taking the pictures I have been hitting up the garage sale’s and the thrift stores. And I’ve got a whole pile of new treasures. Everything from furniture to clothes to awesome vintage-ness and a pair of hip waders for Scott ($3!) I’ll get them cleaned up and photographed and post them soon! Have a happy Sunday. We are having BBQ chicken, corn on the cob, watermelon and cuppiecakes. When those are combined with AC it makes these next three months of broiling heat bearable.
A few of my Favorite Blogs
Several weeks ago I was nominated for the Beautiful Blogger award by SkooksPlayground. She has a fun little blog and an adorable tutorial for a recycled paper flower. Go check her out. So- the deal is I post seven things you don’t know about me and then tell you my fav blogs that I think are just beautiful. Here goes.
Seven things about me-
- I am terrified of semi-trucks driving next to me on the freeway. It ALWAYS makes me nervous.
- I failed the driving test the first time I took it when I was 16.
- I’ve never colored or highlighted my hair.
- I once rode a camel at the circus
- I hate the various ins and outs of all the remote controls to run the TV. And I’d rather just not watch TV than try and turn it on.
- I don’t listen to music while I make stuff. I prefer quiet so I can think and daydream uninterrupted.
- I have the patience of a 3 month old baby that is hungry. Maybe less. I hate waiting for ANYTHING.
My recent favorite blogs-
1-They Draw and Cook– an illustrated recipe blog. It is seriously so fun to hang out over there!
 [ image and recipe by Andrea Sipl ]
2- A Collection A Day– just what it sounds- artist Lisa Congdon is posting a new picture of one of her vintage or antique collections each day this whole year. There is something for everyone over there.

3- Moggitt– These two ladies scour the internet to find the very worst from the decorating and design world. It never ceases to amaze me.
 [ “The Bomb Chair” image from freshome via moggitt ]
4- ThankYourBody.com– My friend Robin’s blog about how to appreciate and take care of these wonderful bodies we have.

5- Obsessive Consumption– illustrator and pure awesomeness Kate Bingaman-Burt posts a new doodle every day of something she has purcahsed. I’m obsessed.
 [ image by Kate Bingaman Burt ]
6-Knock Off Wood– Stay at home mom Ana White builds furniture. And six months ago she started blogging and posting the plans. For free. She draws and posts a new one EVERYDAY, for you to build. She has plans for everything, from this cutie secretary to beds, dressers, armoires, picture frames and patio furniture. Seriously, everything. Oh, and did I mention that she lives in Alaska like 100 miles from a Home Depot? If you’ve not heard of her blog before, go check her out. You’ll never need to buy furniture again.
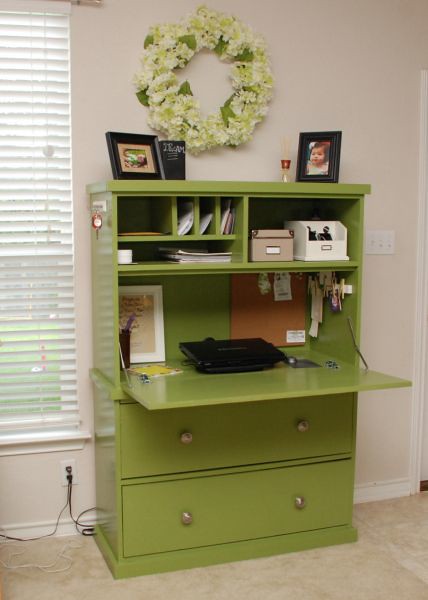 [ image by cinnher73 on flickr built from Ana’s plans]
7- Kiersten Writes– My friend from highschool is making it in the big times. Her first book Paranormalcy will be published this September in the USA and like a gillion other countries and languages. (Click on that link and pre-order it, seriously- it’s going to be as big as that one vampire series with the cold sparkly guy and the werewolf. And the pre-order price is 40% off… which makes it 10 dollars. Go do it, you won’t be sorry.) She is hilarious and fiesty and I love reading her blog everyday. Also, this post from her is probably my most favorite post of all time. It changed my life.
 [ Looks awesome, no? Go order it ]
Ok, so those are a few of my daily reads. I have hundreds of blogs in my Google Reader, but these are among the few that I don’t ever skip. I hope you find something new that makes you smile! Have a happy weekend!
Twirly Skirt Tutorial
Good morning (afternoon/evening/midnightsnack) everyone! If you are coming to visit from Sew&Tell, hello! I’ve got a cute tutorial for a little reversible twirly skirt today. (You know how I love things that are reversible, aprons, jackets, and skirts.) I made up this pattern last summer and I’ve made literally dozens of them since. They are fast, easy, and super cute. And Creamie is still wearing the skirt I made for her last summer. So that means this pattern will fit about a 6 month old to an 18 month old. And it’s perfect for twirling. Or for kicking stuff.
 See that little reversible-ness peeking out? I love that it’s cute on the inside!
So let’s get started! I’m giving loads of directions and photos, which if you are an experienced sewer you can just skip through, but this is the perfect project for a beginner. It’s like 10 straight seams. And you will impress everyone you know. It’s just that cute.
Materials Needed-
- Basic Sewing supplies (scissors and ruler, or rotary cuter, ruler and mat, iron and ironing board, pins, sewing machine)
- 2 Fat Quarters (or 1/4 yard of two fabrics)
- 45 inches of two coordinating trims
- 18 inch piece of 1/2″ no roll elastic
- Coordinating thread
 First choose two fat quarters. (In hindsight, I wouldn’t pick such a dark one to go with this lighter one. When she is wearing the pink side I can still see the dark fabric behind it. But not enough to bother me, but you might want to check that before you sew.) You can prewash or not, which ever you choose. Iron the creases out and trim them so that they are both square, making sure they are the same size.
 Next you are going to cut your fat quarters in half the long way so you end up with two rectangles that are about 9″x22″. (If you are using quarter yard cuts you don’t need to do this step. Just sew each piece into a tube.) Sew them together (stripes to stripes, dots to dots) right sides together along both short sides of each set. You should end up with two tubes, one in each print.
 Press all four seams open, and get rid of any other wrinkles that have cropped up.
 Now we are going to make our hem. Along the bottom edge press your fabric up one quarter inch all the way around.
 Then fold it up another 1/2″ and press again. Press the hem of your second piece of fabric the same way.
 Stitch right along the edge of your folded hem, backstitching at the beginning and end, on both pieces. I used white thread on both of them because I am going to cover this seam up with ricrac later. But if you aren’t going to add trim, or it’s not going to cover up this seam make sure you use coordinating thread.
 Add your trim to each side of your skirt. I folded over the edge of the ricrac to make a clean start. And I changed my thread to pink.
 Then just sew your trim on all the way around. For the ric rac I sewed right down the center, making sure to cover up all my white stitching.
 Now do the same thing with your other piece of trim and the other skirt piece. And change your thread if you need to.
 Now you want to trim your two skirt sides to make sure they are even. Lay them out with the hemmed sides together and trim the opposite side (which will be your waistband) so everything is nice and straight. A cutting mat and ruler make this MUCH easier.
 Now turn your two pieces so they are right sides together, one tucked inside the other and sew the two raw edges together to join them into one long tall tube.
 It should look like this. Only you should make sure that your polka dots are straight before you go cutting and sewing things together. Oops.
 Now it’s time to make the waistband. Fold that long tube over, wrong sides together this time, carefully rolling the seam so that it lays as flat as possible. You want the seam between the two fabrics to be right on the top of the skirt, and as straight as can be. You can pin this if you need to. I used brown thread on the top and my white thread in the bobbin so that the thread matched each fabric. Start sewing the casing for your elastic. If you are using 1/2″ elastic, make a 5/8″ casing. Backstitch at the beginning and end (leave a 3-4 inch opening) so you don’t tear your seam while you insert your elastic.
 Use a safety pin to push it through the casing.
 I had to trim my elastic a little smaller for Creamie’s skirt. I think I ended up at about 16 inches (for the skirts I made her at age 6 months and the skirt I made her on Wednesday. She’s not getting bigger, just getting longer.) Make sure your elastic isn’t twisted and overlap your ends and stitch together. Tuck the elastic back inside the waistband.
 Pull your fabric smooth and stitch your opening closed. Then adjust your gathers evenly around the skirt. You are done!
POST UPDATE: I don’t sew the bottom edges of the skirts together. Of course you could, but I like them as two separate pieces so they can give the skirt a little more movement.
My favorite thing about this skirt is that there is absolutely NO wasted fabric. And it is so easy to customize it with different fabrics and trims. I love me some good ricrac, but you could also use lace or ribbon, a little bow or a ruffle, mini pompom trim, etc. It’s a great project to have fun with.
Now, send that little dancer to do some twirling. Or some coloring, it’s good for both things.

*** This pattern is for personal use only. You are welcome to use this tutorial to make skirts for yourself or to give as gifts, but please do not sell skirts made from this tutorial. If you post pictures of a skirt you made using this tutorial, please link back to this site I’d love to see your pictures. But please don’t post any part of this tutorial on your blog. Thank you. ***
Panda Bear Love
 [ image found via Jamie at inspiredmess ]
I’m working on a new tutorial that will be ready tomorrow. It’s a cute one and it makes me happier than a panda on a rocking horse. And that’s pretty happy.
Happy Mail
Yesterday I received the cutest little book in the mail from BitterBetty. We got to talking a while ago about my new vintage sewing machine Bluebird. She has a great little blog full of her crafty adventures and I’ve been reading her for months. After chatting for a while about my dual needle options she told me she had something to send me. Well it arrived yesterday and it is just so much fun!
 That peachy little book isa White Sewing Machine guide from the 1940’s (I think). It’s full of little tricks to add details to your clothes (Title is “how to add magic style touches to your sewing”) and I just LOVE it! It is so awesome, thank you so much Betty!
The little blue journal is from my friend Danielle, it has graph paper inside which is seriously the best thing ever. I love graph paper and graph paper in a cute little notebook is even better. Thank you dear friends, they are sure to be put to great use!
My blog-versary and favorite holiday is coming up and I’ve got some wonderful things up my sleeve. I’ll share more details later, but be warned that a serious party will be involved!
(In other news, my blog host is freaking out and things are looking pretty wonky around here. I’ll hopefully be able to get it figured out and back to normal soon. In the meantime, please ignore the weirdness.)
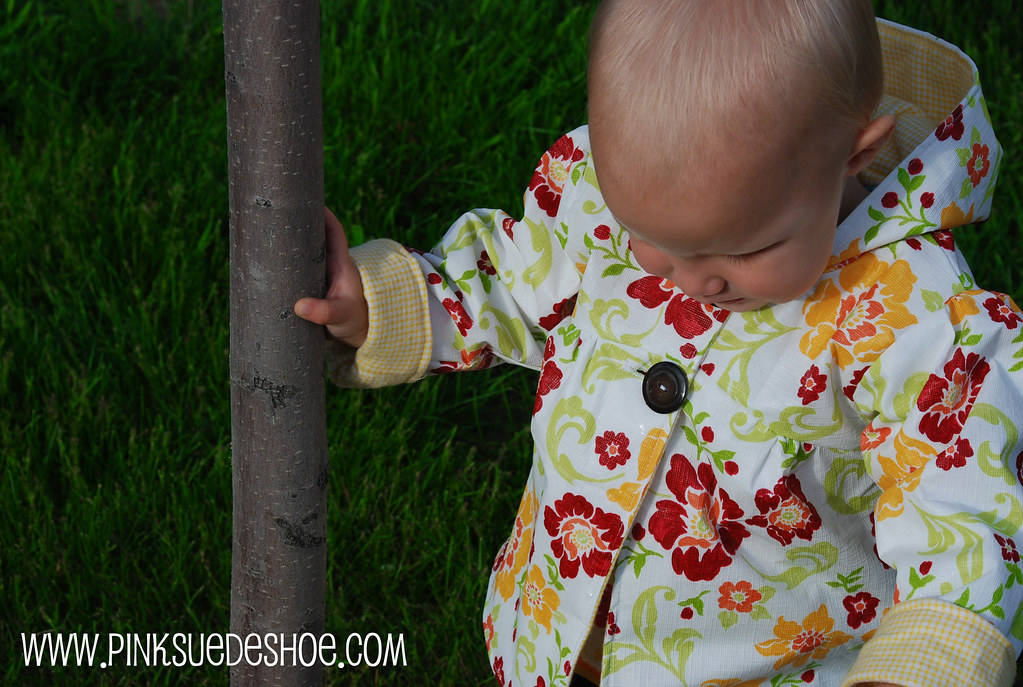
One Little Raincoat? Check.
A few weeks ago Mrs. Moen gave me the idea to use a tablecloth in a sewing project. Which is brilliant really, only I didn’t have any. I was walking around my big box retailer not long after that and found this floral tablecloth. It was big, like seven feet long and five feet wide. And it was $3. And I got an idea.

It was one of those summer picnic staples. You know, the vinyl tablecloth you can wipe right off because it’s waterproof. And that’s when my brain said “Waterproof huh… I bet that would make a good raincoat.” I picked up a little yellow flannel and came home. (If I had dug through my stash again I would have found a yellow sheet that was on my bed in junior high in this exact same color and pattern, but I didn’t think of that.) I had recently purchased this pattern and it was as if the stars had aligned. (The pattern comes with sizes 0-5. I made size one and I’m pretty sure she can wear it for two years at least.) I finished this yesterday during naptime and I couldn’t be happier. Creamie is pretty pleased with it herself.
 I love this little face.
 It has little gathers in the front and back and at the top of the sleeves. It also has turn up cuffs (good for growing girls and growing arms) and a great big hood.
 It is also fully lined and can easily be reversible. Which is brilliant.
 Man, I love this girl.
I think I might go get a few more buttons. The pattern only calls for one up at the top, but that’s not going to keep out much rain is it. Of course, buying two or three more buttons is going to cost more than half what I’ve already spent. I figure I used about 25 cents worth of the tablecloth. There is about $1.25 worth of flannel in there. And the buttons are 75 cents each. (I opted to omit the fusible interfacing layer because the tablecloth is pretty sturdy.) So right now we are at a grand total of $3. Man, I love being cheap.
There was only one thing about the pattern that I didn’t really like. After sewing the two layers together all the way around the outside edge it said to turn it right side out through a sleeve. But that hood is pretty good sized and I didn’t want to fight it through a tiny sleeve opening, so I left about six inches open at the bottom and turned it that way. Much easier in my opinion. Also, there is one major downside to sewing on vinyl. When you make a mistake your needle holes are permanent. When I was sewing on one of the sleeves the fabric got a little folded under and stuck in my seam. So after I unpicked it I can still see the tiny little needle holes. Ah well, you can’t see them and Creamie doesn’t care. And it’s not like she needs a completely waterproof coat. She’s not going deepsea diving in it.
So, what am I going to make out of the rest of this tablecloth? I don’t know. Maybe more rainjackets… one in every size.
I’m linking up to Mrs. Moen’s tablecloth challenge. And now I’m going to pretend that it doesn’t feel like Monday. UPDATE: Also I’m going to link this up to Sew&Tell at Amy’s. Both places are full of fun things to look at. So, go look :o)
Happy Monday!
I’m so grateful for all the men and women who have served in the military to preserve my freedoms. And to celebrate them I’m going to be doing this.
 [ image by Boy_Wonder on flickr ]
Happy Memorial Day!
Little Creamie
I snapped these pics of Creamie yesterday afternoon. She loves to be outside. But she is very clear that “outside” is the other side of the railing on our small back patio. It was fun to watch her run in the grass. She is getting so big and I love all the new things that she is learning.
 I love this sweet little face.
 Whatever she is up to, it looks like no good. And yep, her hair really is that blonde.
 She got really excited about a bush. Really, it was exciting.

 I just don’t get sick of this face. It is endlessly entertaining.
 Have a happy weekend!


